Navigate
Welcome
The reality for many teachers is that we'd love to grow our ability to reach students—whether you teach in a studio, own one, or stick to online classes the way we do at Heart + Bones. Sooner or later, you find yourself looking at your phone or camera, about to press record.
Most of us didn't start teaching because we wanted to be on camera. But here we are. And the upside is real: it can support the growth of your business, shape the experience your students have watching your classes, and help you build the career you actually want as a teacher.
This course is for anyone who hesitates a little—whether that's not knowing how to film well, or looking back at footage and not loving what you see. It's also for anyone already recording who wishes they felt more confident, or is just looking for the process to feel a little easier.

Module 1: Light & Audio Basics
The two things that make or break a video—and the two easiest to get right. Start here before touching anything else.
Lesson 1: The Mindset Before the Setup
Take aways:
A few minutes of intentional setup before recording saves far more editing time after
There's no fixed "right" workflow, expect yours to change as you find what works
Action: notice what your current setup looks like before changing anything
Lesson 2: Your Phone Setup, Step by Step
Take aways:
Front camera is easier for solo framing and social; back camera gives better resolution for longer-form content like YouTube
Monitor yourself by pairing your phone to a laptop, or use a mirror if you don't have one
A tripod, or even propping your phone against something solid, beats handheld every time
Slightly underexposing protects detail you can recover later; overexposing loses it for good
Action: record a 10-second test clip and check framing, stability, exposure
Lesson 3: Light & Audio
Take aways:
Bad audio loses viewers faster than any visual issue, a clip-on or plug-in mic is worth it
Face your light source; harsh overhead lighting causes shadows and off skin tones
Natural window light is the best free option, soften it with a sheer curtain if it's too strong
Action: redo your test clip checking specifically for sound and light
Module 2: Scripting & Recording
Lesson 1: Why (and How) to Script
Take aways:
Bullet-point scripting keeps you focused and cuts editing time, compared to talking until you run out of things to say
Find the one main point per video, less is more, especially for short clips
Action: write 3 bullet points for your next video, nothing more
Lesson 2: Where to Place Yourself in Frame
Before you hit record again, a quick, useful habit: thinking about where in the frame you actually stand.
Why it matters
Where you place yourself changes how a video feels to watch. Dead centre reads as direct and grounded—good for teaching straight to the camera. Off to one side opens up space next to you—good for showing something: a modification, a prop, a demo, a bit of the room. Neither is more "correct." They just do different jobs.
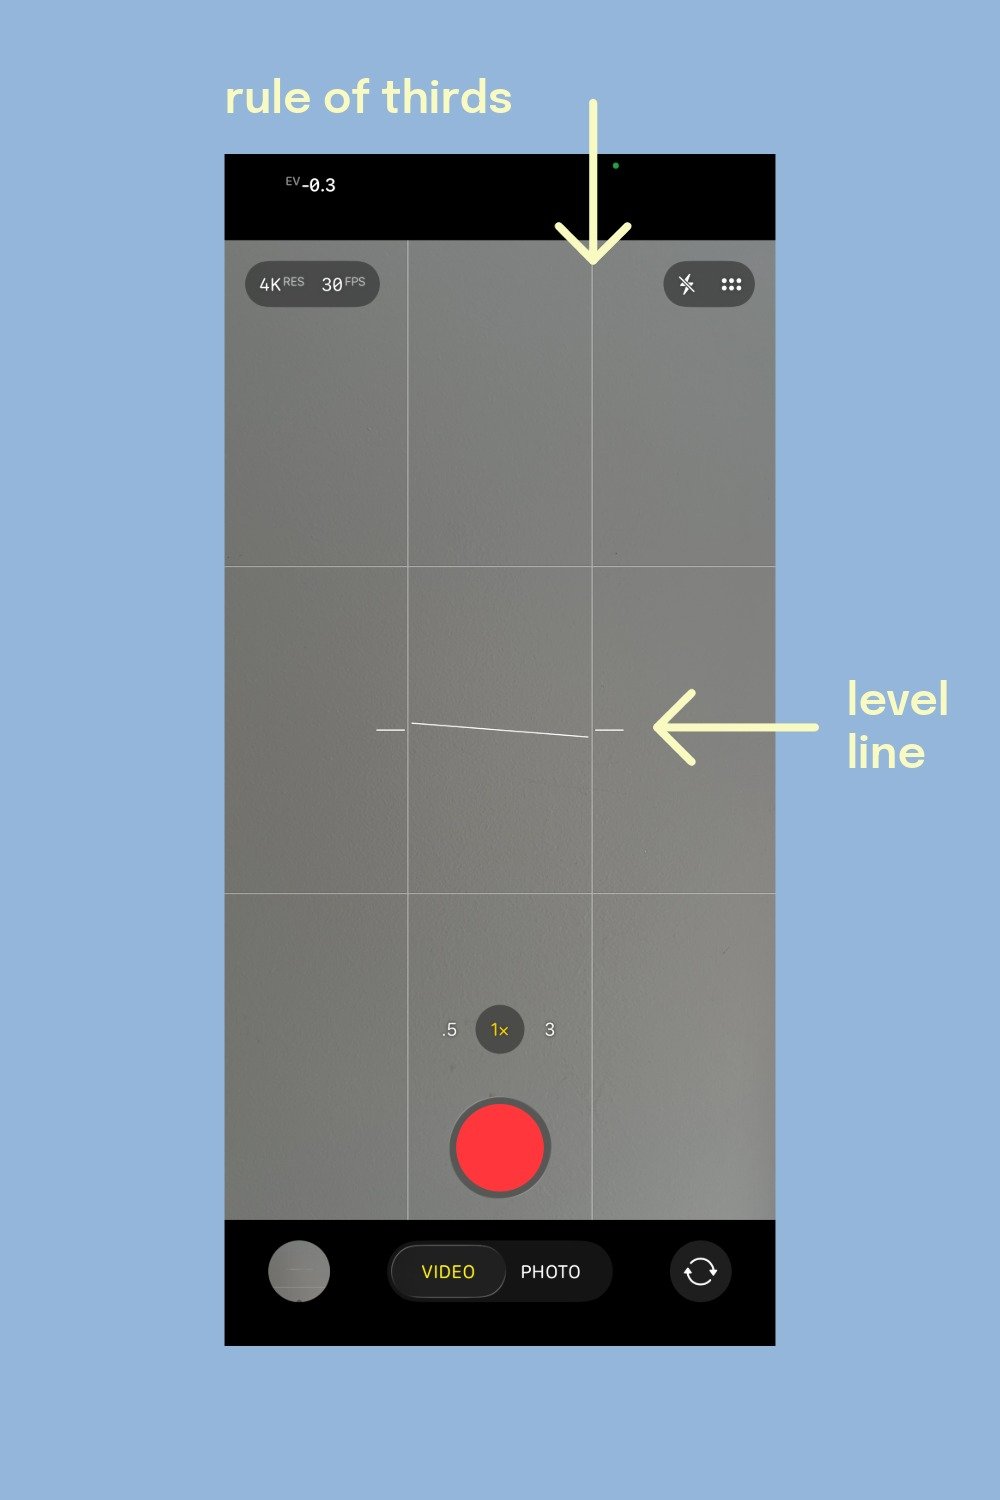
The idea: rule of thirds
Imagine your frame split into a 3×3 grid. Two lines across, two lines down.
When you open you phone to record, you will likely see them already set up for you to use.
Instead of centering everything, you place the subject along one of those lines, or where the lines cross. It tends to feel more balanced and intentional than dead centre, especially when there's something else in frame worth looking at.
Most phones will also have a level line in the centre of the screen also, handy when setting up your shot!
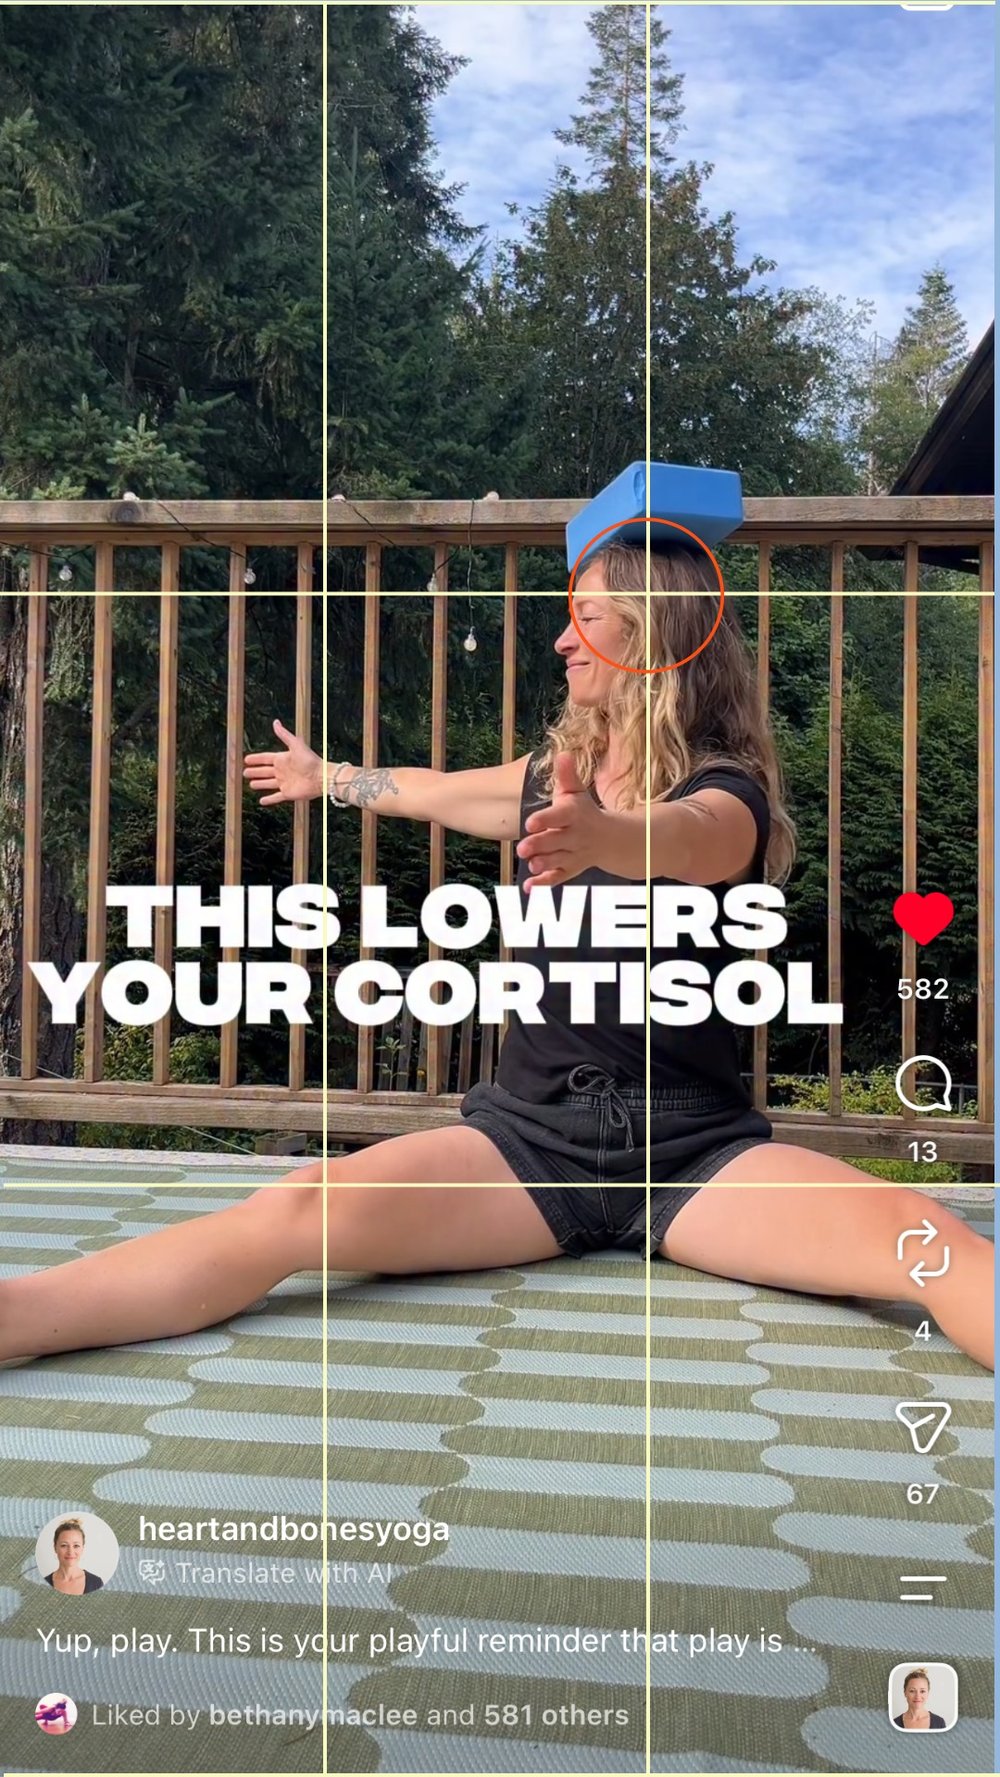
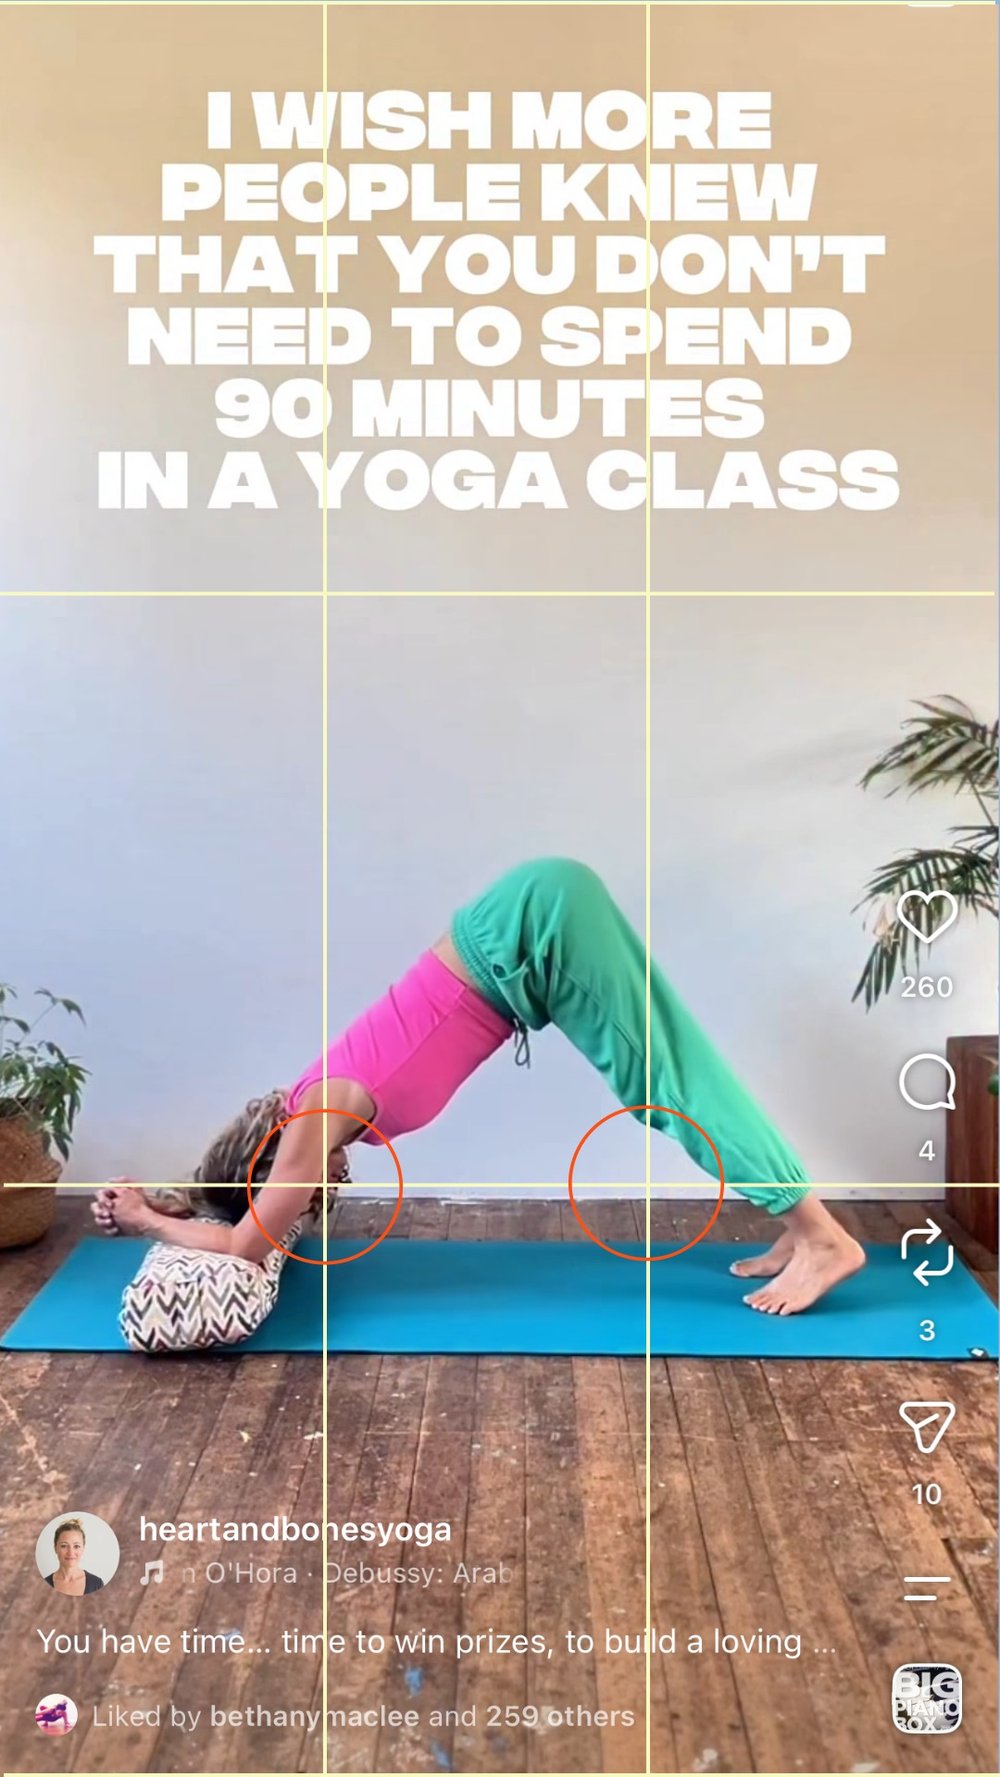
Why the intersections matter
Where those grid lines cross (four points total) are called your focal points (some people call them "power points"). They're not just a division of space; they're where the eye naturally lands first when someone looks at an image or frame. It's the same reason a subject placed dead centre can feel strange while one placed on an intersection feels like it's drawing you in.
So it's not only about which third you stand in—it's about lining up the most important detail (your eyes, a prop, the modification you're demonstrating) with one of those four crossing points specifically. That's the exact spot most likely to catch someone's attention first.
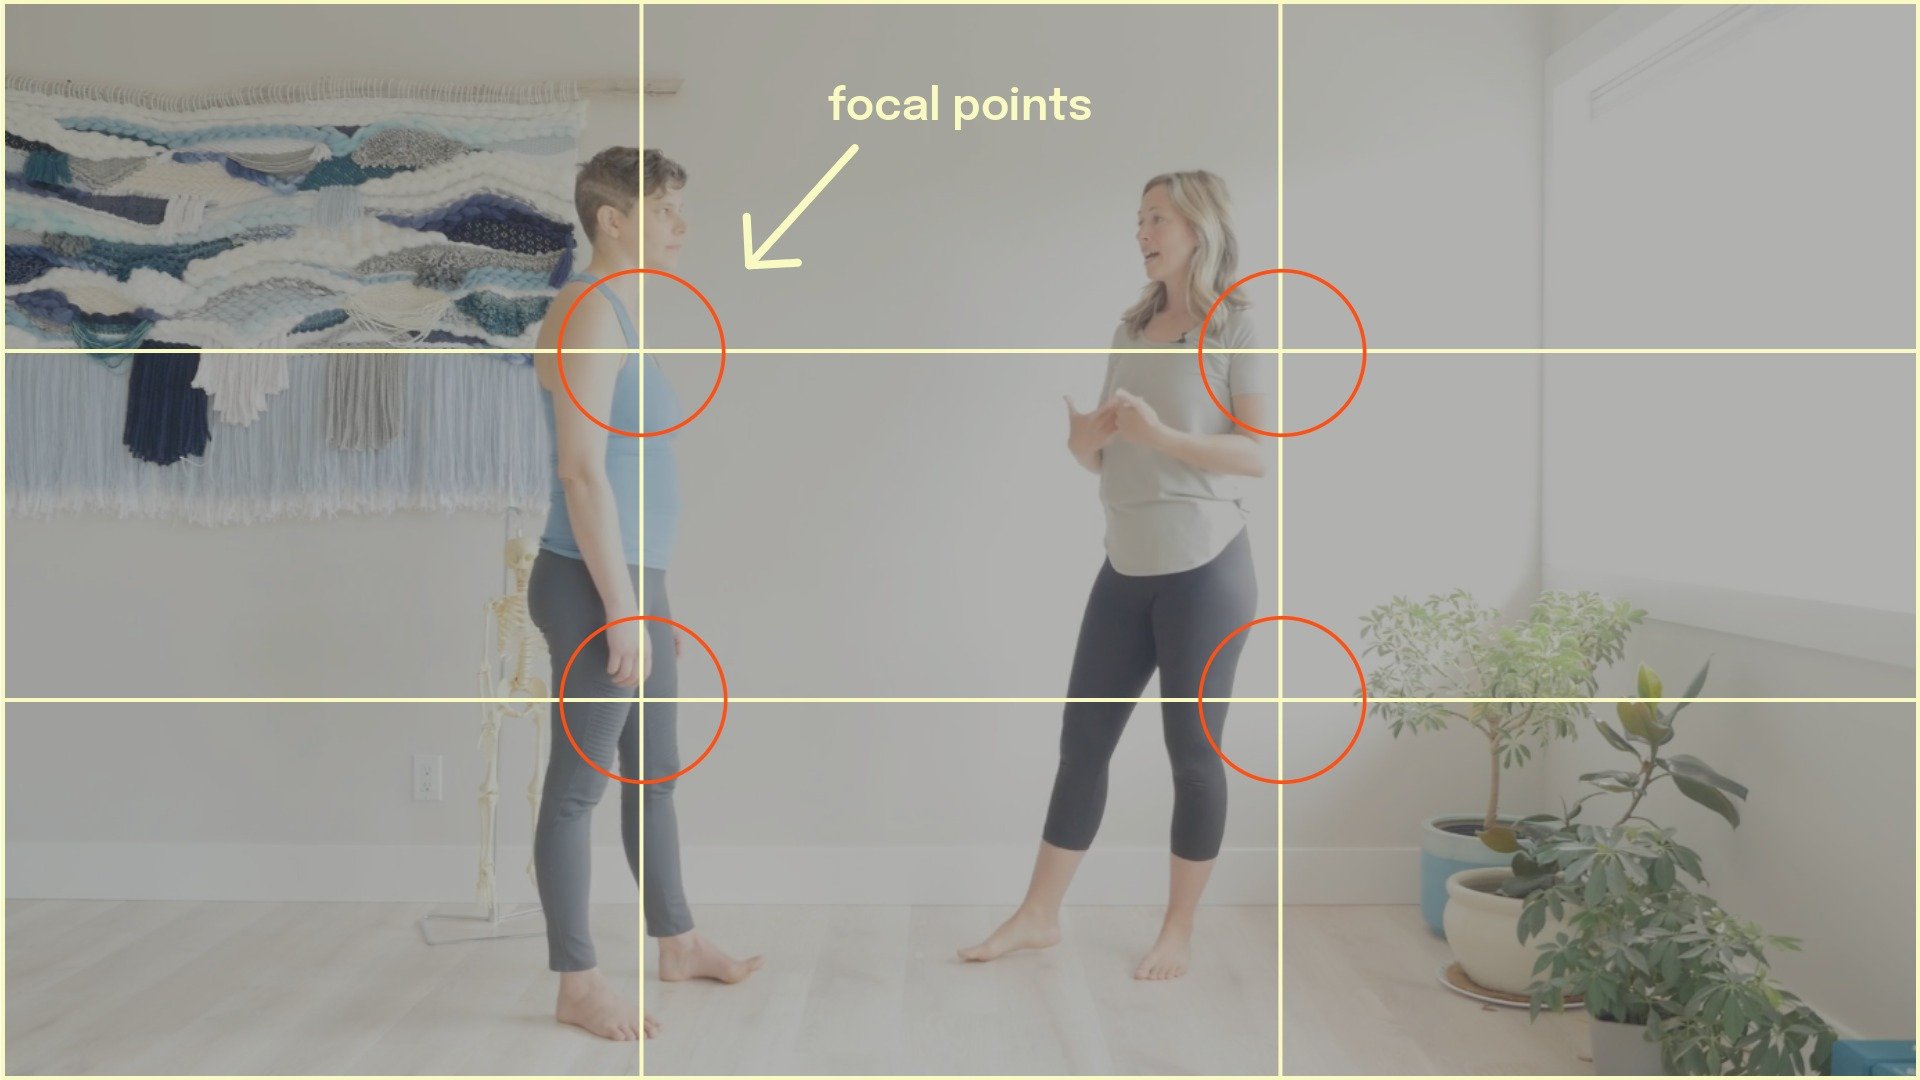
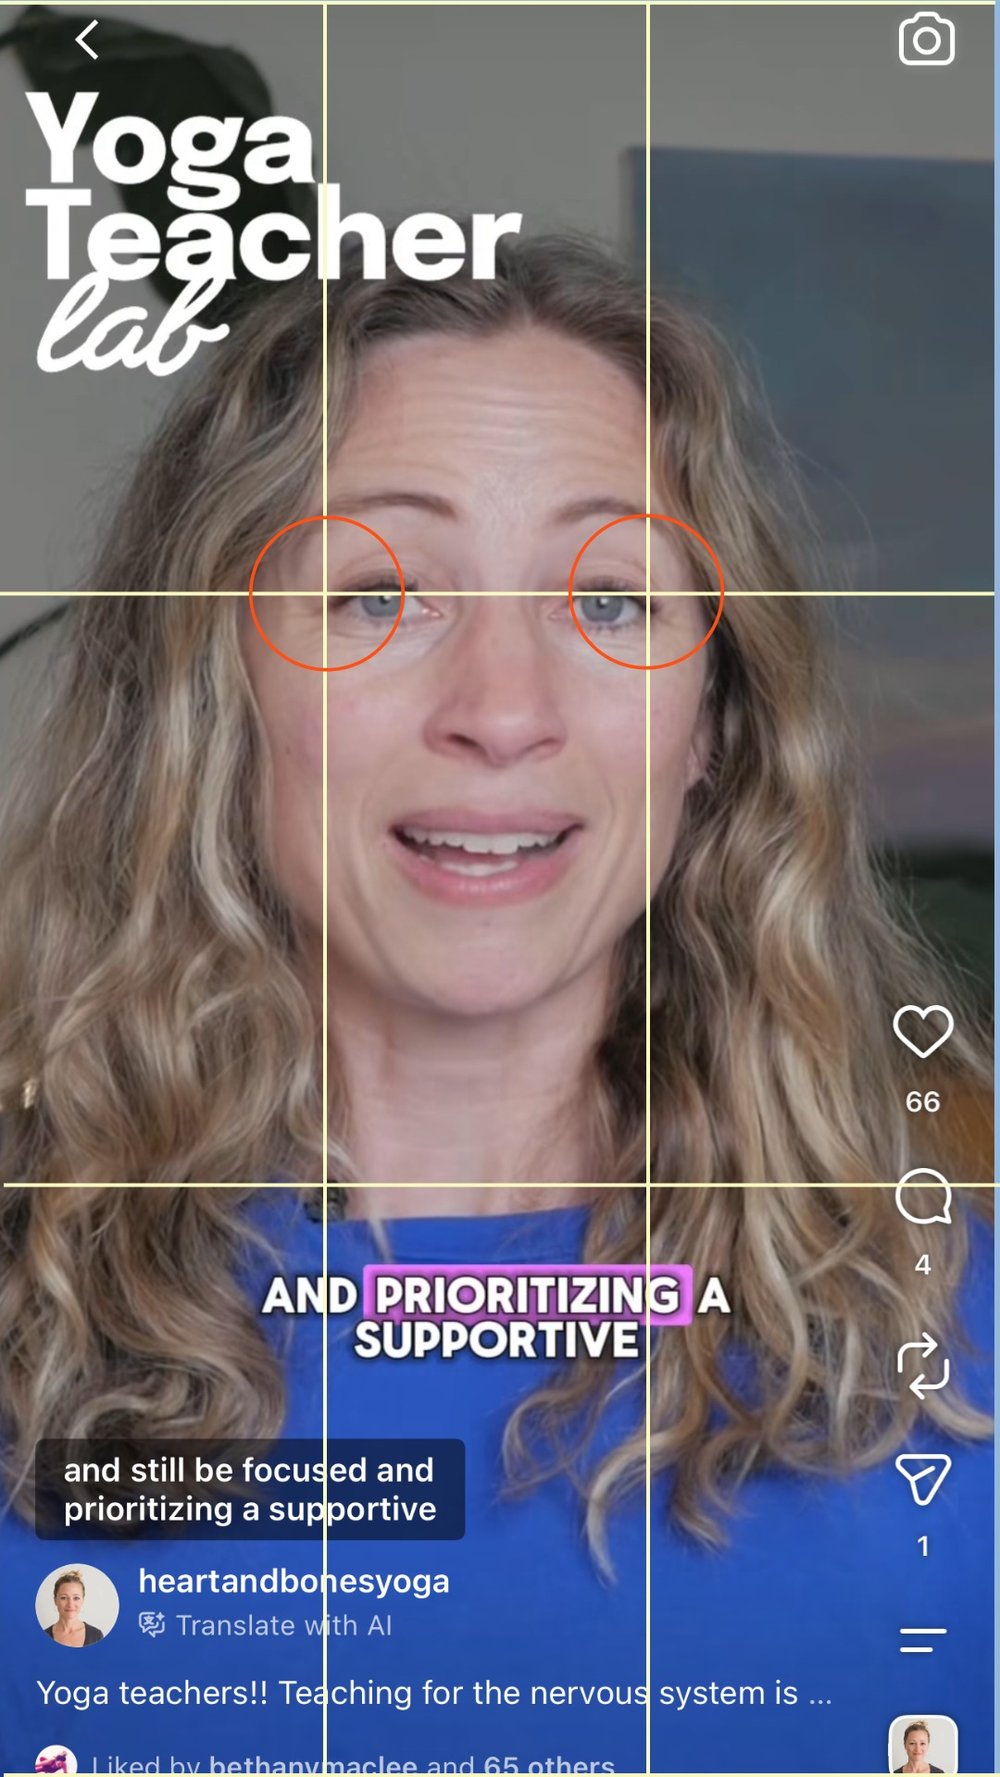
How we use it at H+B
- Centered: our default for movement videos
- Off to a third: when there's something to show—step to the left or right, Brea often does this for her Move and Learn classes, or courses
- Same idea applies vertically for Reels/TikTok—top or bottom third instead of left or right
A few things to keep in mind
- Leave a little room above your head—don't crop right at the top of frame
- If you move off-center, face into the open space, not away from it. It should feel like you're making room for something, not drifting out of frame
- For vertical video specifically, added captions can help people follow along. But don’t forget that engagement buttons often cover the bottom and right edges. If you're off to the right third, double check nothing important lands under those buttons
- This is a guide, not a rule—centre is completely fine on its own, and you don't need to force a third into every shot
Lesson 3: The Recording Process
Take aways:
Recording each bullet a few times gives you room to warm up, three takes is a solid starting target
Editing out pauses, ums, and reading moments is normal, not a sign you did it wrong
Action: record your 3 bullets, 3 times each, no editing yet
Module 3: Camera Confidence
Lesson 1: Normalizing the Discomfort
Feeling shy or reading too much into how a video performs is a normal part of the process
You're allowed distance between your public self and your private life, privacy and growth aren't in conflict
Action: name one thing about being on camera that feels uncomfortable for you
Lesson 2: Reframing the Algorithm
Real Talk: Reframing the Algorithm
Creating content is a long game. The person you see going viral has usually been at it for a while, you just didn't see all the practice and effort behind it.
And going viral only means something if it's for the right reason, and for the thing you actually want to be known for. So if you're starting out, stress less about each piece of content being exactly right, and start treating them as reps instead. If you like to lift, you don't start out lifting 100lbs. You pick up something smaller and build from there.
Posting regularly takes real commitment: a willingness to try things that flop, and a level head about how any one video performs. If a piece of content doesn't land, that's not a reflection of you. It's just a reflection of something you tried.
Here's a small shift that changes a lot: instead of asking "will the algorithm like this," ask "would my audience like this." The algorithm is really just a reflection of your community. Making people, not metrics, your starting point is a more grounded way to create, and it keeps you focused on who you're actually making this for.
It also helps to decide, on purpose, what you're optimizing for. If growing connection with the right audience is the goal, comments, shares, and saves are the metrics that matter. If building your business is the goal, conversions are what count. Pick the one that matters to you this month, rather than chasing virality for its own sake.
And remember: you can't control what a platform does. You can only control your output, your effort, and your willingness to play.
Take aways:
- Ask "would my audience like this" rather than "will the algorithm like this"
- Pick one metric to care about this month, connection or conversions, instead of chasing virality
- Your metric can also be your business results, so you focus less on views, and more on things like how many students showed up to your class
- Action: pick your one metric for this month
coming soon
Module 4: Building Your B-Roll Bank
Lesson 1: What B-Roll Is and Why It Matters